There are multiple ways to register a customer record for an event in the back office, as well as registering multiple customers for a single event, and a single customer for multiple events. Depending on the context of when/why you would use one way, or the other, it is up to the end user. AA (Association Anywhere) favorites can also be added for specific events to register customers for.
Register a Single Customer for a Single Event
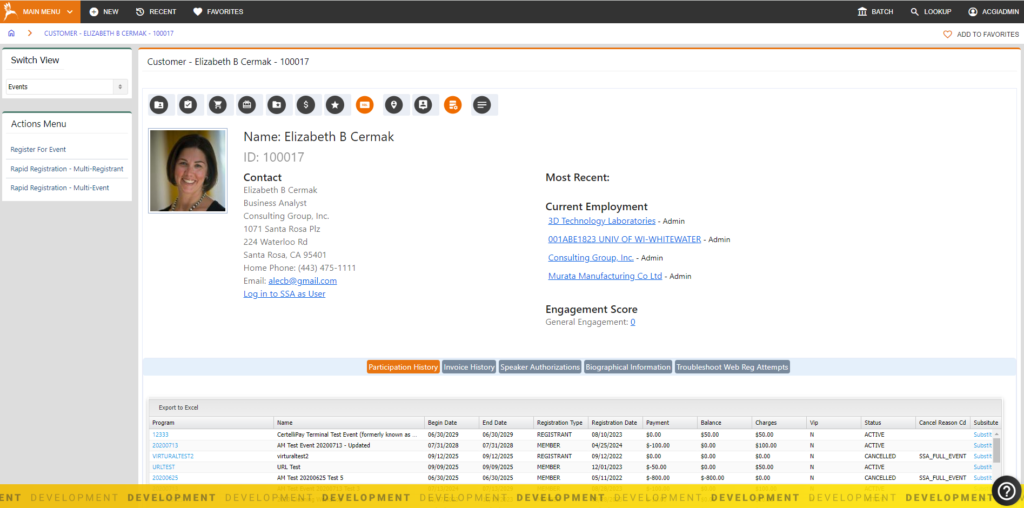
- Directly from customer record:
- Lookup a customer record and switch view to Events.
- Under the Actions block on the left of the screen, click the link titled “Register for Event”.
- Select the Event you would like to register this customer for by clicking on the Event ID link

- Going thru tab/ribbon/action
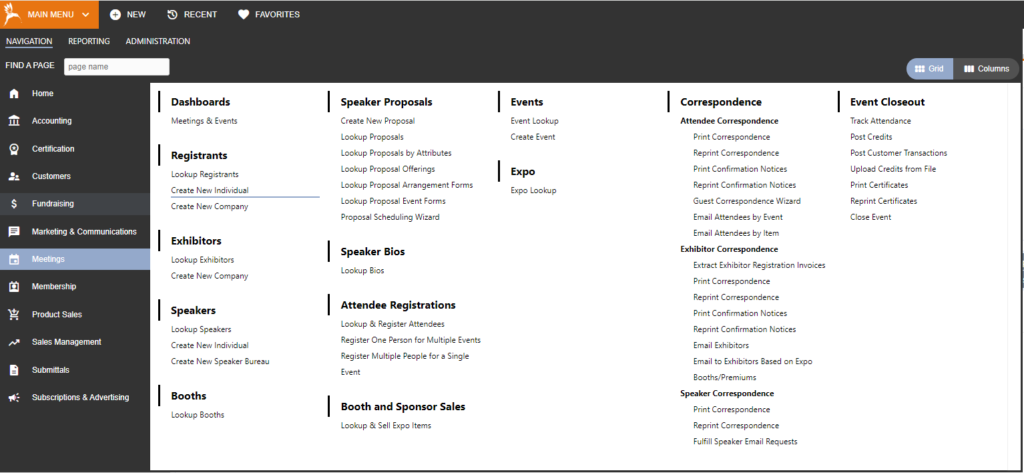
- Go to Meetings | Attendee Registrations | Lookup and Register Attendees. This will bring you to the customer lookup screen where you can query the customer you are attempting to register.
- Upon clicking the ID of the customer record in the list of your results, the customer record will display and already be in the “Events” switch view context.
- From here, you can click “Register for Event” under the Actions block.
- Select the Event you would like to register this customer for by clicking on the Event ID link

- Thru the event itself
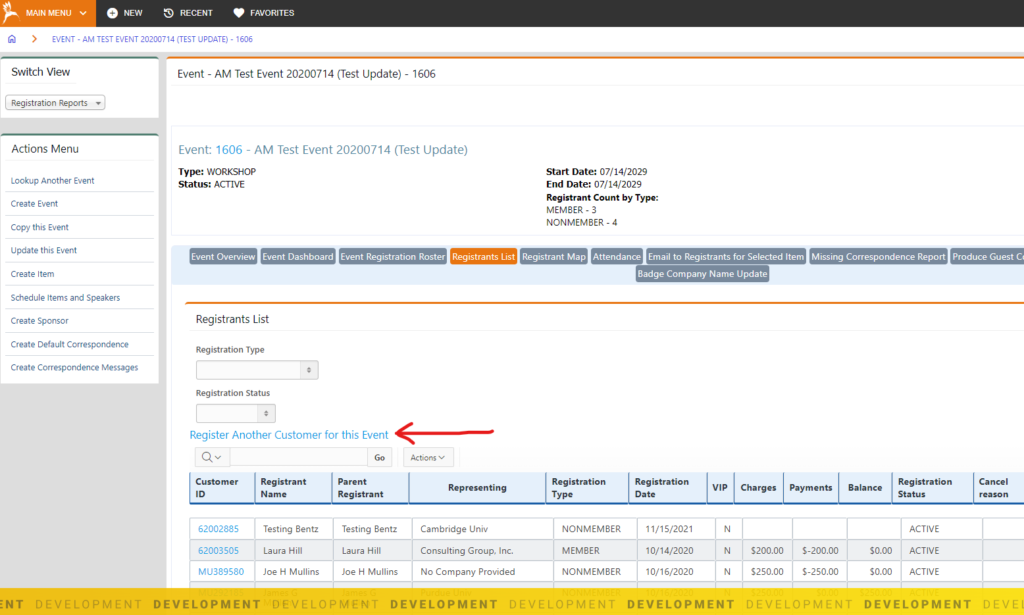
- Go to Meeting | Events and click on the event ID of the event. This will bring up the Event Masterfile of the event.
- Switch view to “Registration Reports” and click into the sub-tab labeled “Registrants List”.On this page, there is a button titled “Register Another Customer for this Event”.
- Clicking this button will bring you to a page to enter in the customer ID of the record in which you wish to register.
- If you do not know it, you can click into the magnifying glass icon to the right of the field and search for the customer you wish to register.
- Upon finding the customer record in your query results, click the ID of the customer record and it will insert the ID into the field and you can continue. You will then be on the first page of the back-office registration system.
- Using any of the above options will direct you to begin the registration process.


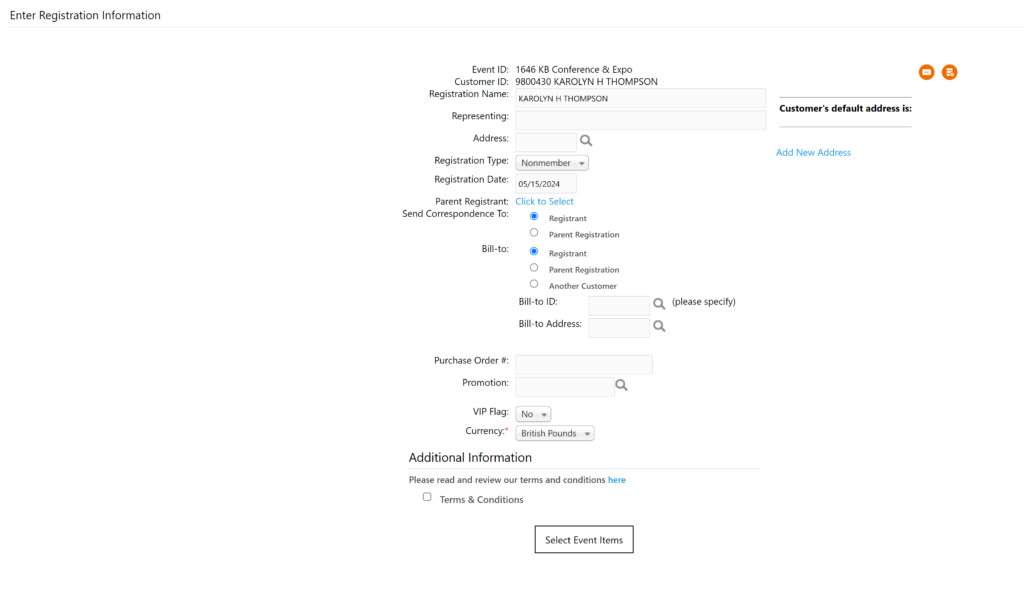
Enter Registration Information
- Confirm the customer’s Registration Name and the Organization they are representing.
- Select the appropriate Registration Type for this customer
- Confirm the Registration Date
- Indicate the Bill-To for this event registration. The Bill-To will either be to the Registrant, or you can select another customer/company to be the payee.
- Enter the optional Purchase Order # or Promotion Code being used for this registration, if needed.
- Set the VIP Flag. This will indicate whether this customer is flagged as a VIP for this event.
- Set the Currency, if other than default.
- If Event Registration Attributes have been enabled for this event, complete the attributes in the Additional Information section.
- Click Select Event Items
Select Event Items
- Click the Register button next to the primary event item you wish to add. Note: You can only add one Primary item to an event registration.
- If Secondary Items have been added to this event, select the Additional Items you wish to add by clicking the Add Item button next to the item. Note: You may add multiple Additional Items to an event registration if their date & times do not overlap.
- Click Take Payment if you want to enter payment for this event registration. If you want to create an open invoice for this event registration to pay later, click Finish Without Payment.
- From here, you will see options to Register Another Customer for this event or register this customer for another event.

